Tool 6.6 Taking a soil sample for laboratory testing
Look at the whole paddock and work out what areas to target and where to avoid before starting sampling. Follow these tips to ensure your sample will deliver meaningful results:
- Samples should represent soil conditions in the paddock.
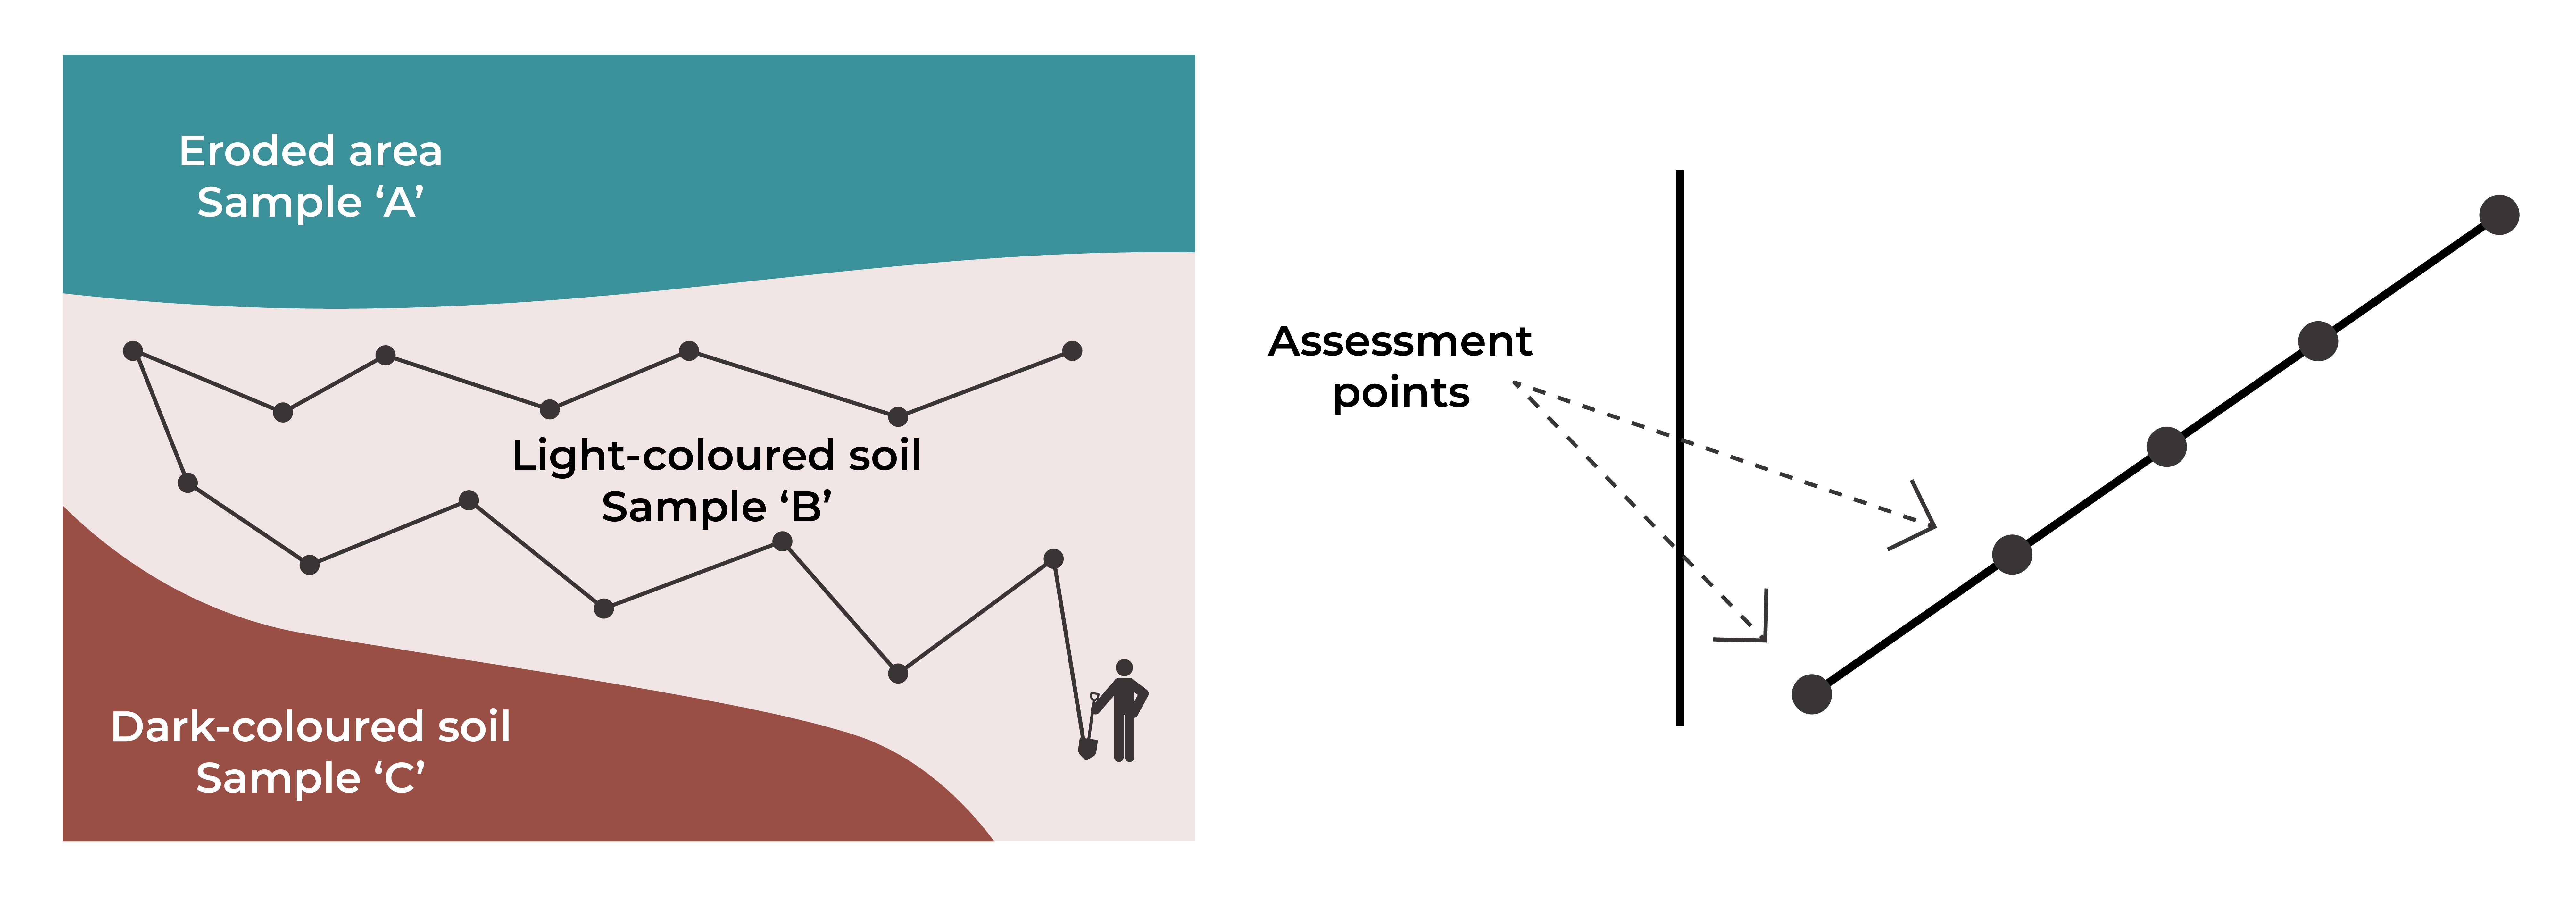
- If there are distinct differences within a paddock, there may be different soil types. If different soil types cover significant areas of the paddock you need to take sets of soil samples for the different soil types. If a different soil type only covers a small area, then just sample the predominant soil type.
- Consider the variations in the paddock determined by soil type, land use, paddock history and animal grazing behaviour before selecting the sample sites. For example, perennial versus annual pastures, or rotational versus continuous grazing.
- Avoid sampling along fence lines, stock camps, under trees, near buildings and troughs, etc., as these areas will have different fertility levels to the rest of the paddock and will give unrepresentative results.
- Avoid sampling from urine and dung patches. These areas are often only obvious when the pasture is actively growing.
- Avoid taking samples during very dry or wet conditions, extreme heat or cold temperatures and soon after fertiliser or lime applications.
- It is recommended you sample when your soil is full of moisture (but not waterlogged) and prior to application of anything which might skew the results (e.g., fertiliser, lime, gypsum). The information you receive will allow you to adjust your management and application rates accordingly.
- Soil tests should be taken regularly (every 3 years) over time to track results and adjust fertiliser programs.
- To compare results between years or across paddocks, carry out the tests at similar times of year, under similar conditions and in the same location(s).
- Record the sampling sites (e.g., using GPS from an app or your farm management software or marking them on your farm map) so the same sites can be retested in the future.
- Send the samples to an Australian Soil and Plant Analysis Council (ASPAC) accredited laboratory as soon as they are taken. Check the ASPAC website https://aspac-australasia.com/certified-labs for a list of accredited labs. Make sure the tests being conducted on your soil samples are ASPAC accredited.
- Use the same lab each time to ensure consistent results.
There are two common soil sampling patterns – zig zag and transect (figure 6.18). The most important thing is to make sure the sample taken is representative of the paddock.

Figure 6.18 Two common soil sampling patterns are the zig zag pattern (left) and transect pattern (right).
Source: MLA, adapted by AWI and MLA
Multiple soil cores are essential to produce a representative sample and give a true indication of the soil in a paddock.
Around 20–30 cores are generally required to produce soil tests for most nutrients and soil pH. More cores may be required for more specific tests such as soil carbon – check with the soil testing lab regarding requirements before sampling.
Once you have collected the required number of cores, mix the samples and place them in a bag labelled with your name, address and the paddock name.
Many advisors and rural merchandisers can take soil samples and help interpret the results of the analyses.


